Where Winds Meet: Swallowlight Divinecraft Dungeon Walkthrough
Learn how to find and complete the Swallowlight Divinecraft Dungeon in Where Winds Meet with a full walkthrough, chest locations, platforming tips, and the rewards you’ll earn along the way.

Here is a walkthrough on how to complete the Divinecraft Dungeon – Swallowlight. This was one of the first Divinecraft dungeons I encountered, and it came with its own fun set of challenges.
Step One - Finding the Divinecraft Dungeon (Swallowlight)
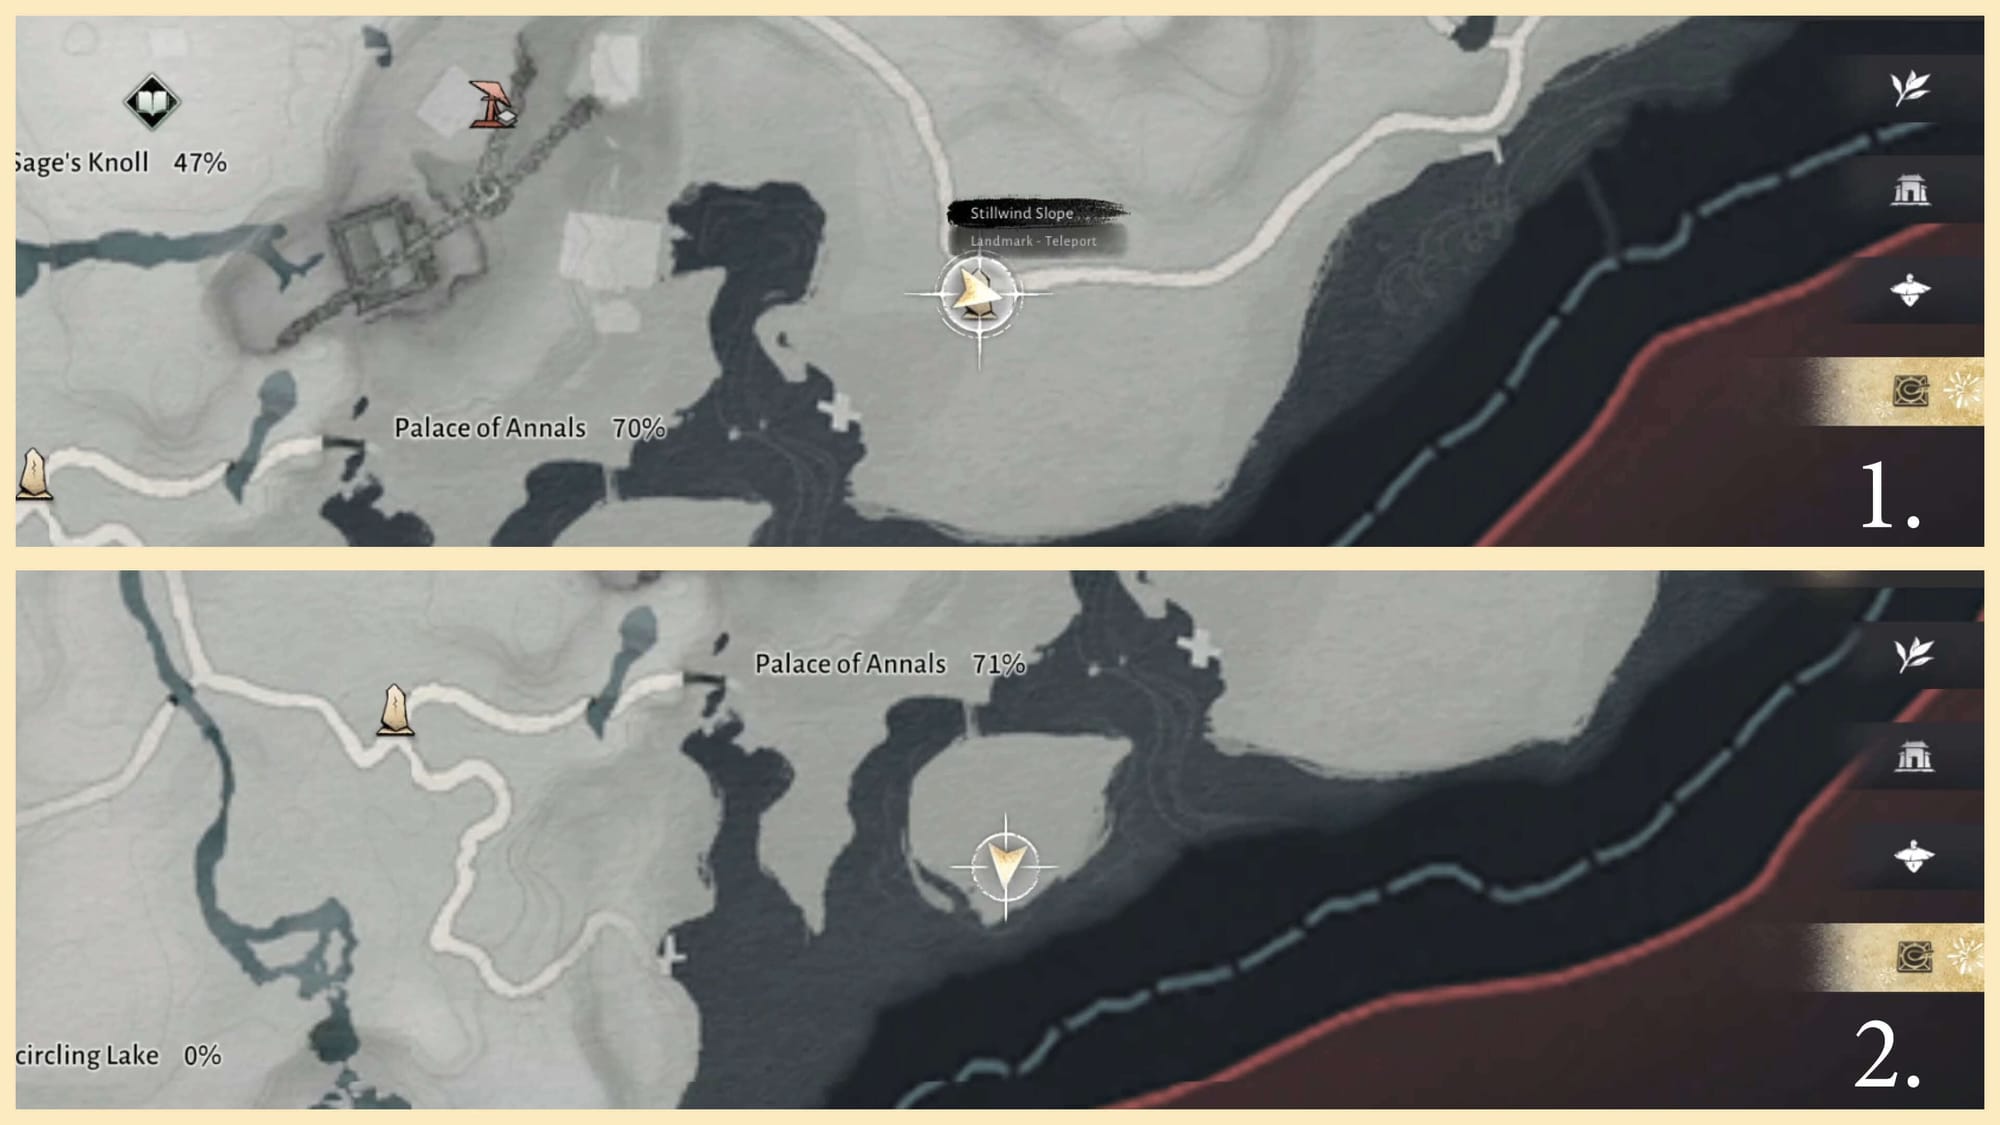
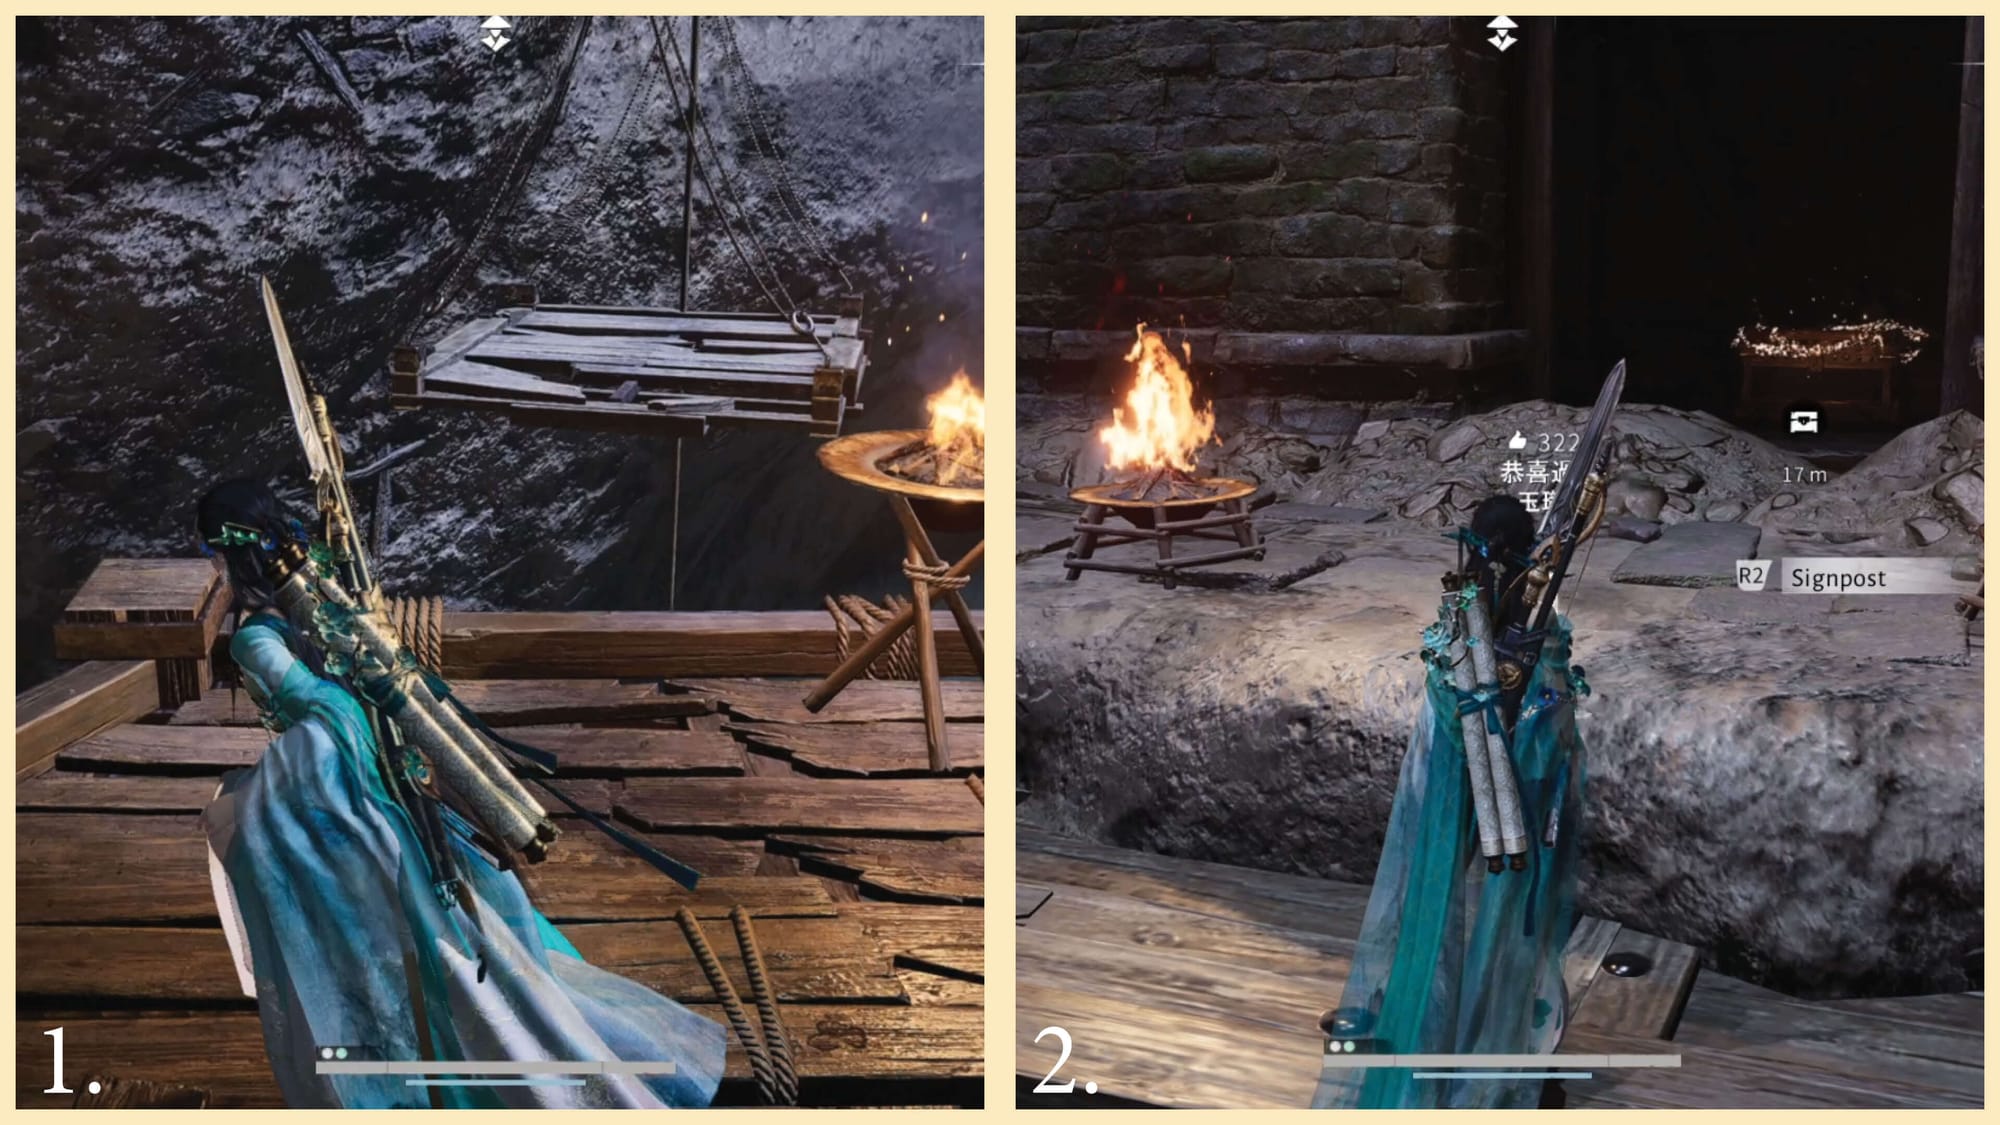
Open your map and travel to the Stillwind Slope teleport, located to the right of the Palace of Annals. From the teleport, begin heading southwest toward the small island. Jump off the dock and swim over to it. The exact map locations are pictured below.
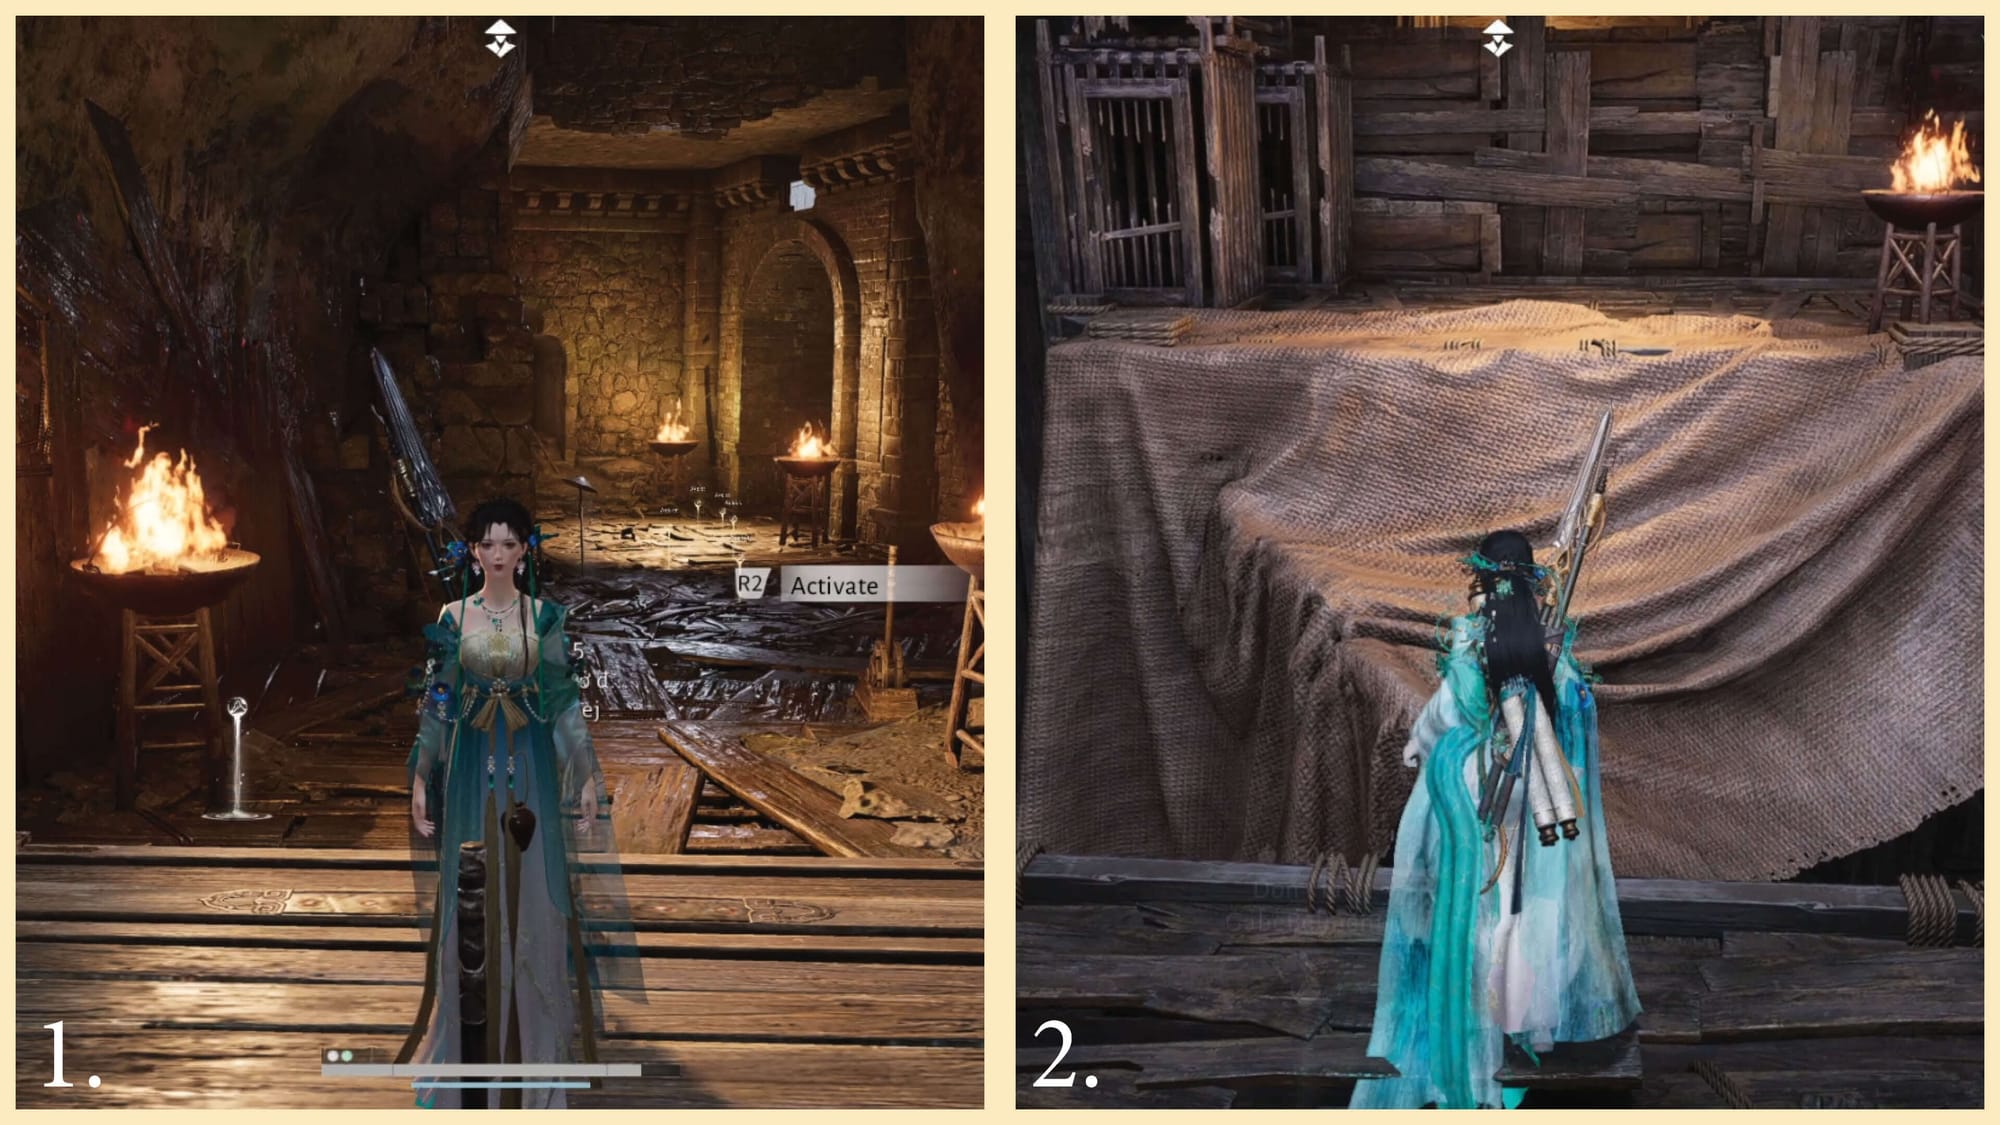
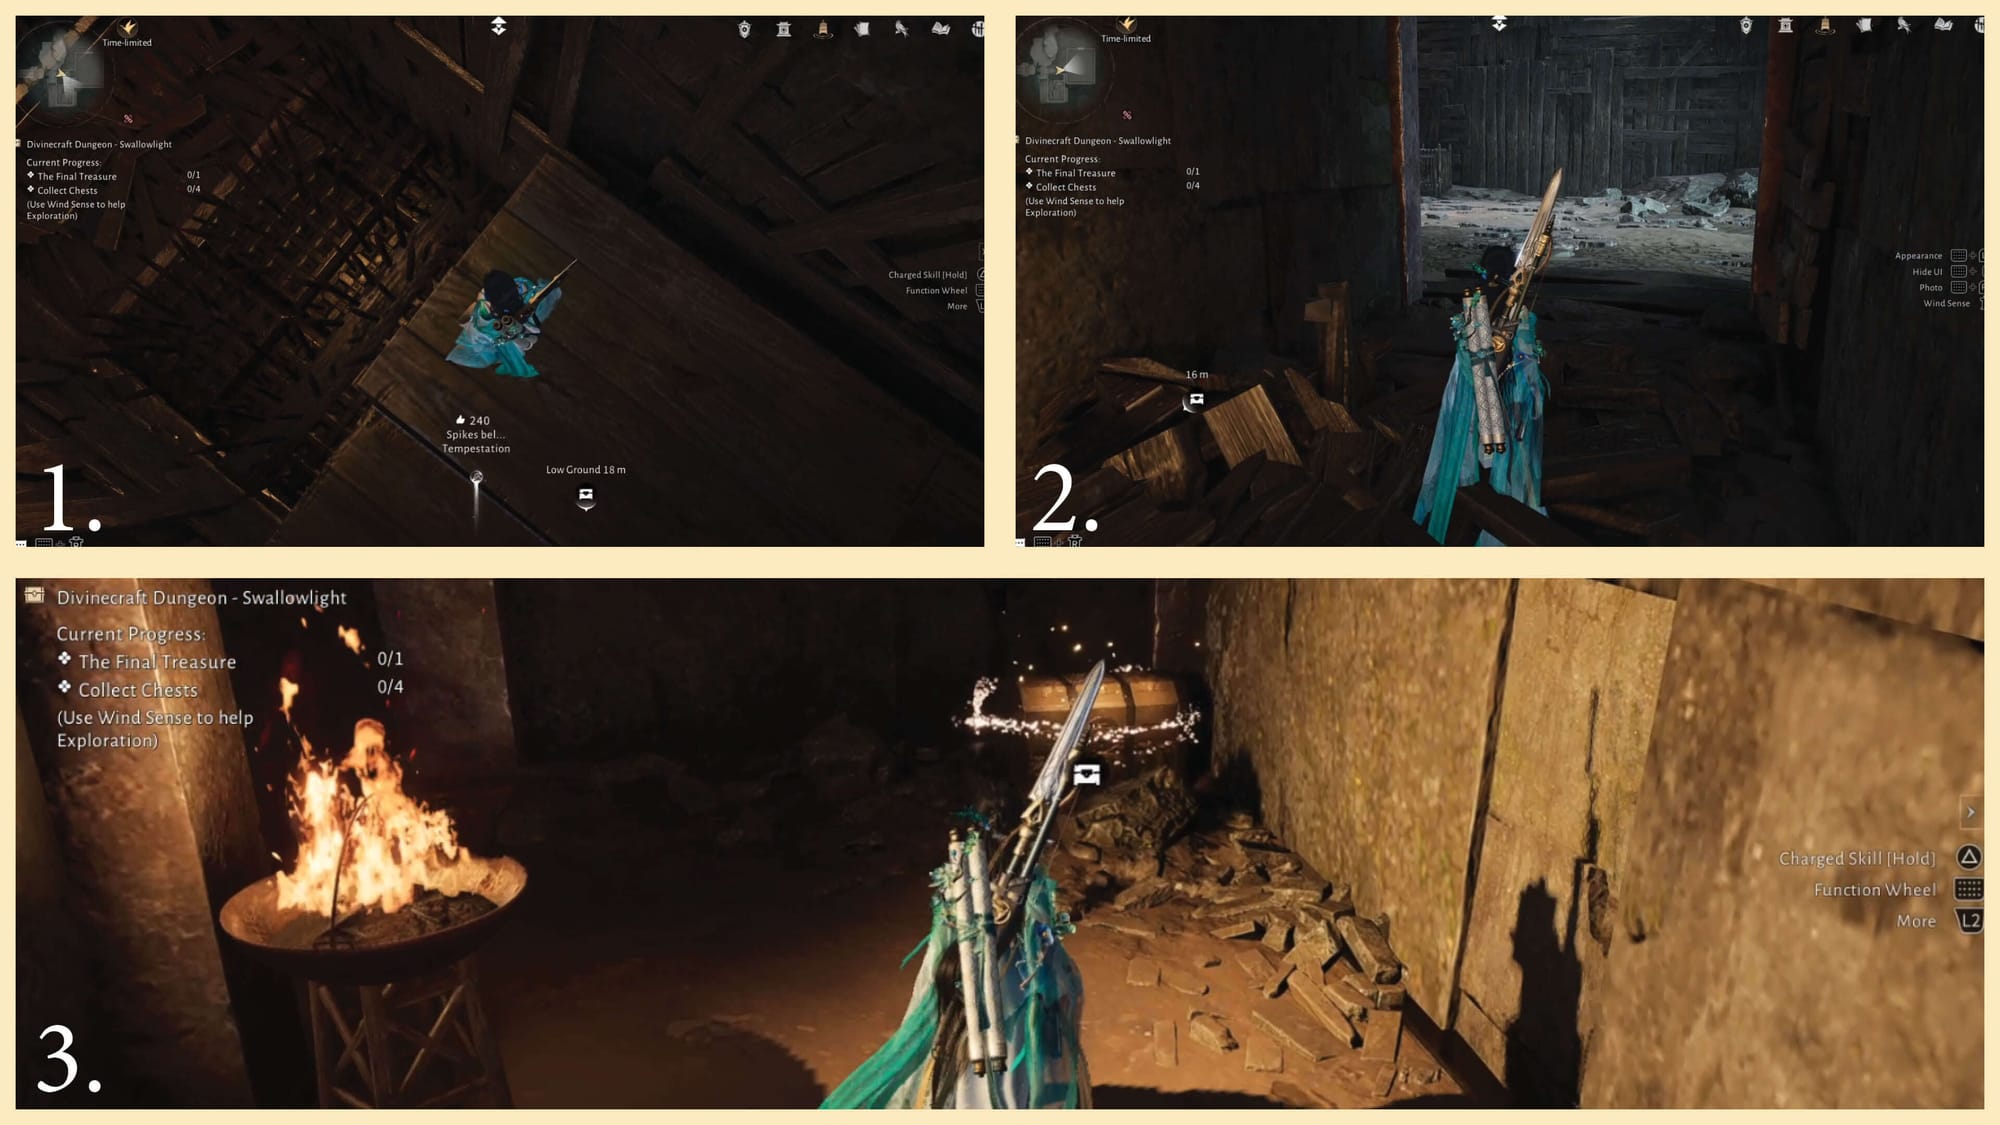
Once you arrive at the island, look for the cave entrance. Head inside and follow the stairs down. You’ll come across a large lever contraption in front of a door. Interact with it to open the way forward. This will officially introduce you to the Divinecraft Dungeon – Swallowlight, and you’ll see a display in the top left showing how many chests are inside, including the final treasure chest. This helps you keep track of what you’re looking for as you progress.
Side note: there are no enemies in this dungeon; the main challenge here is the platform sections.
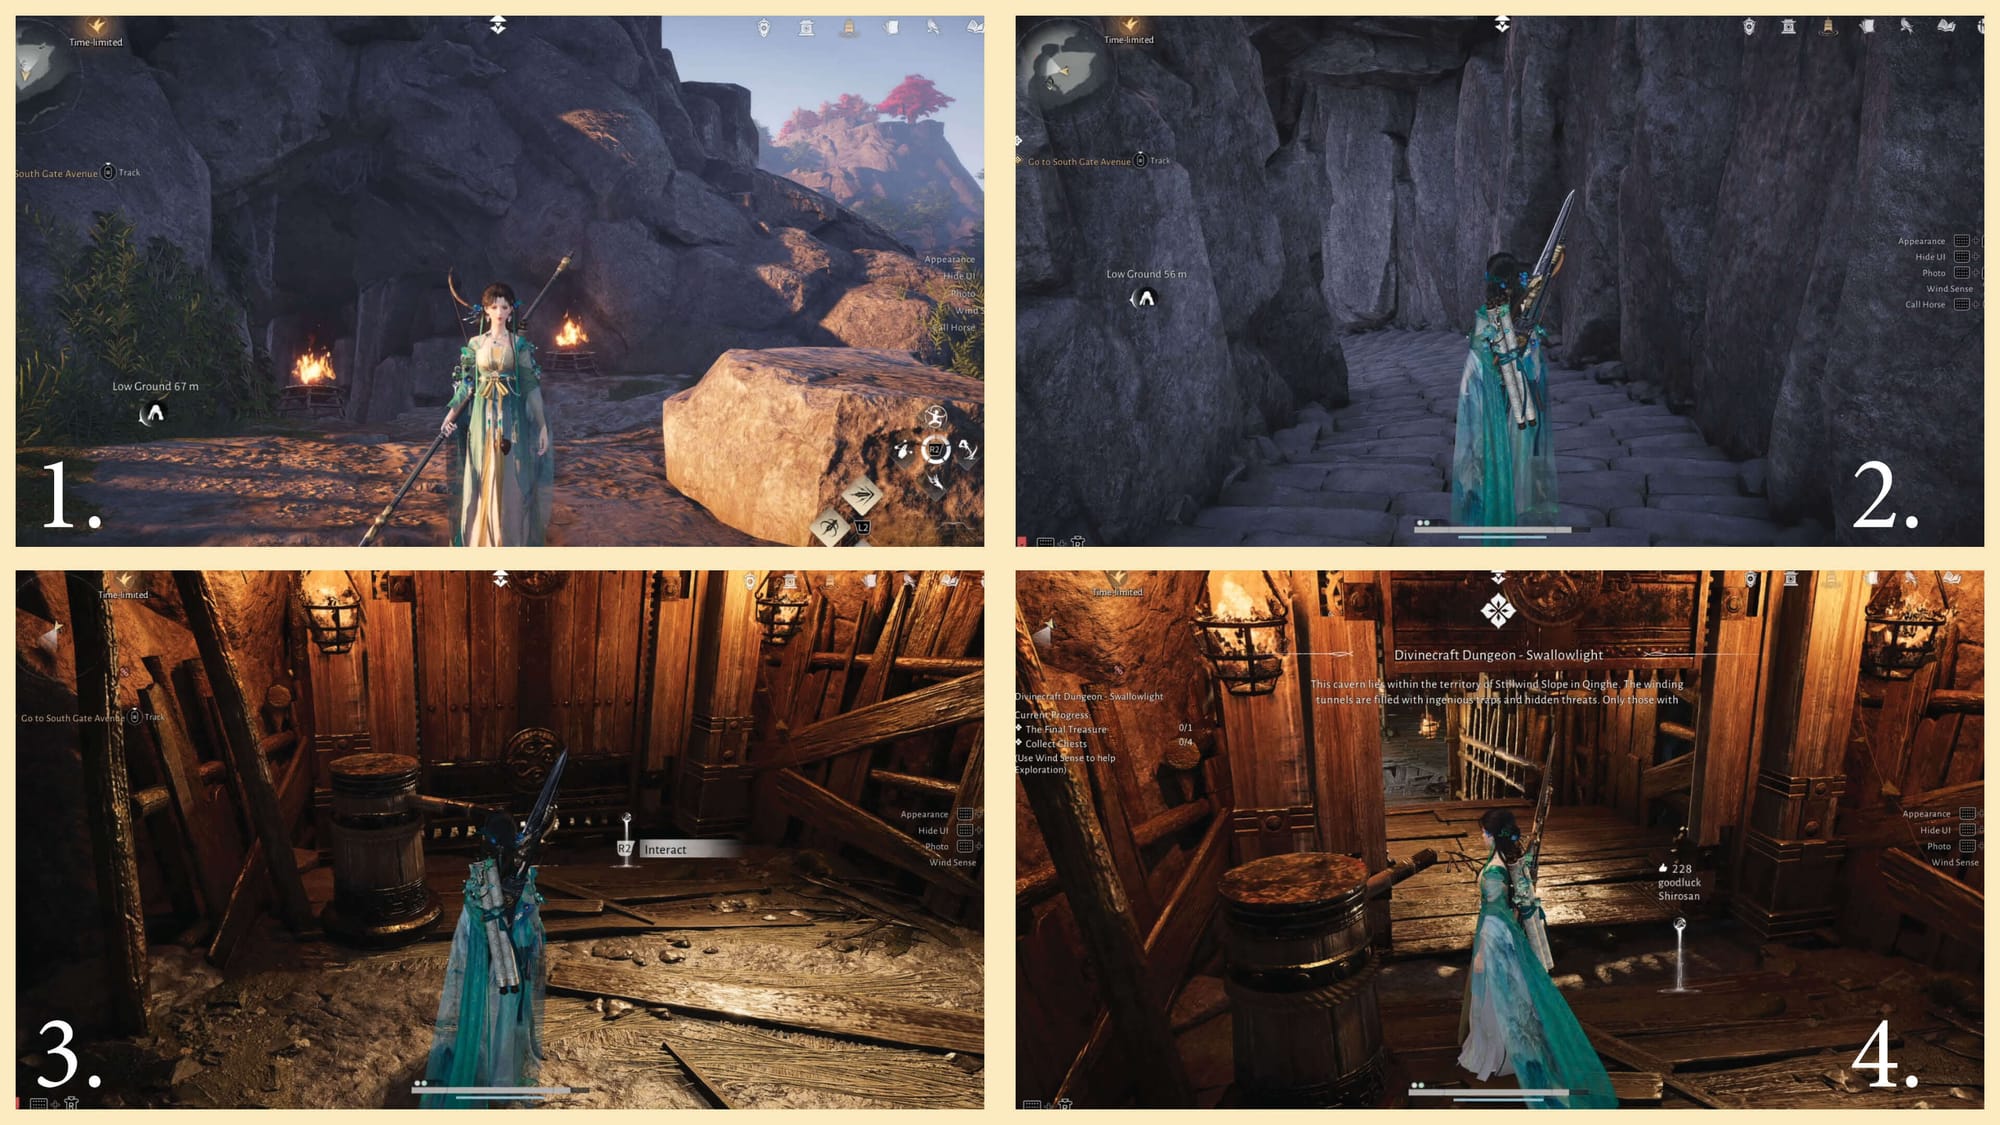
Once the door is open, head inside. You’ll come across an elevator, go ahead and activate it to continue. Once you reach the bottom, keep following the path. Make sure you jump across the crevice ahead and don’t fall into the water.
Step Two – How to Find All Four Dungeon Chests (Swallowlight)
Chest One
Once you’ve made the jump across the gap, continue moving forward. Be careful here, the path ends suddenly with a spike trap. Jump to the wooden platform across from it. This platform will break on purpose, dropping you right where you need to be.
After you land, turn around and you’ll find Chest One sitting directly behind you.
Chest Two
With Chest One in front of you, turn left and you’ll spot an open doorway. Head toward it and jump across to the other side. After you land, continue forward until you reach a hole in the ground. Jump down into it.
You’ll see a stack of boxes nearby, climb up the boxes, and they’ll lead you straight into the room containing Chest Two.
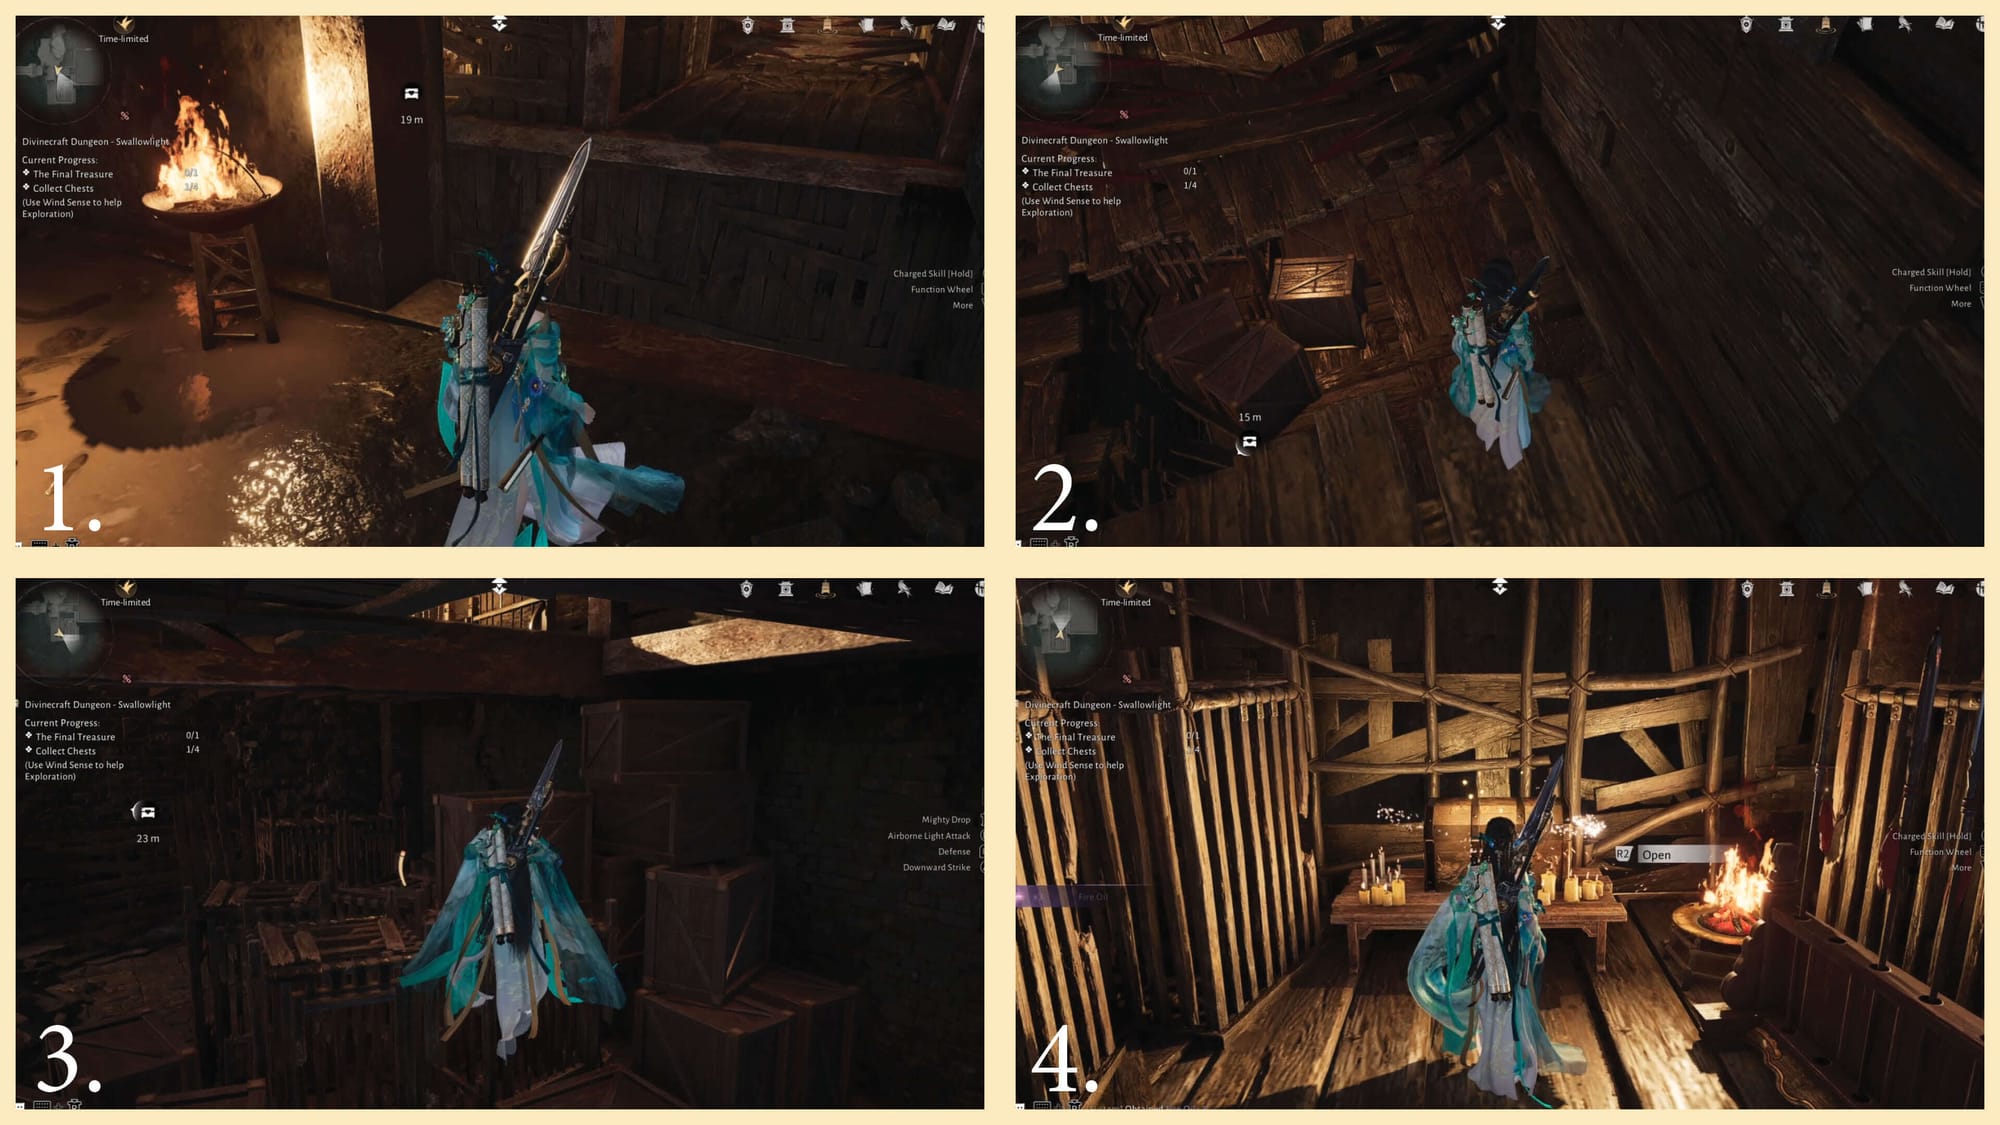
Chest Three
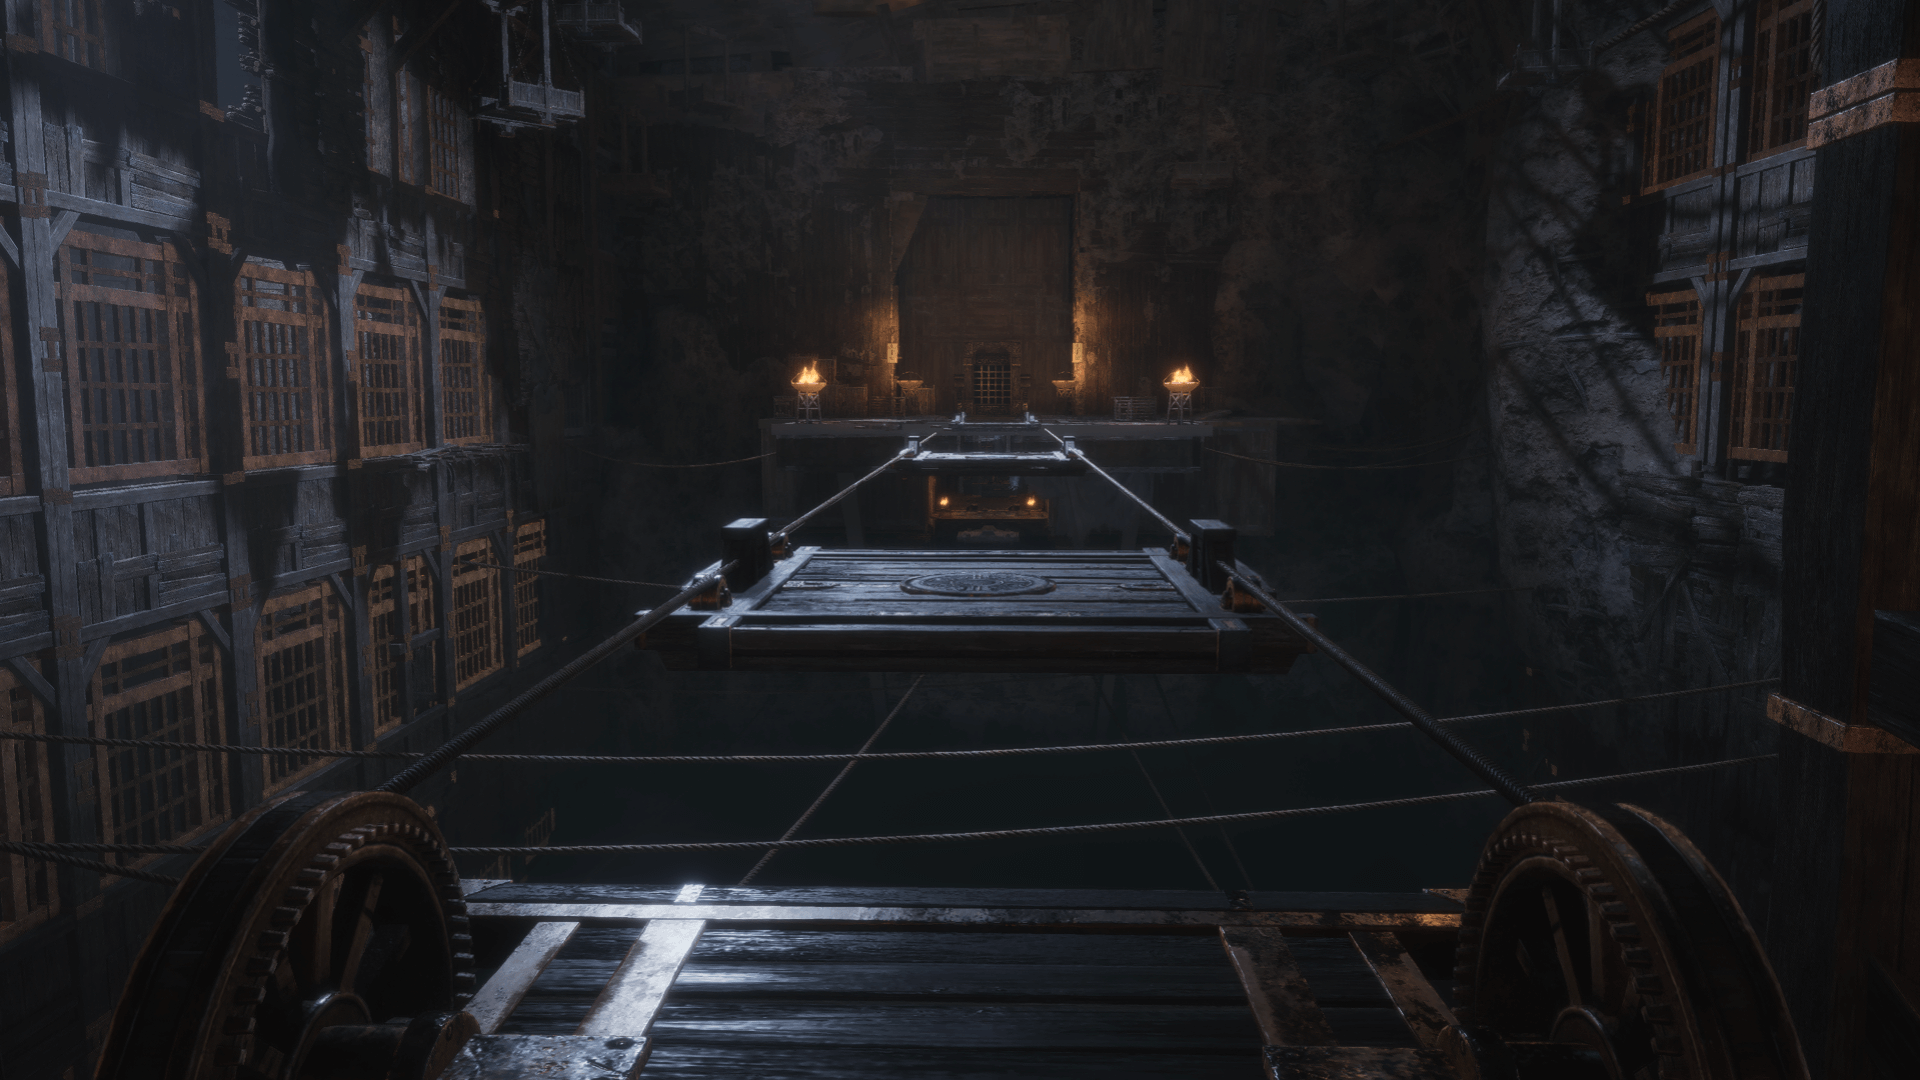
After opening Chest Two, head to the metal barred door and open it. This will take you back to the area where you first fell through the floor. Continue into the large open room, and look to the left, you’ll see a series of moving platforms hanging over a dark, empty pit.
Yep, this is your first true platforming challenge. Time your jumps carefully and make your way across. I noticed a few signposts saying you could dash across, I tried it and immediately fell to my death, but that may have just been user error lol. Use whichever method feels best for you!
Once you’re on the other side, you’ll spot a wooden platform moving up and down. You can ride it down, or simply jump down like I did, to reach the wooden area below. Chest Three is waiting there.
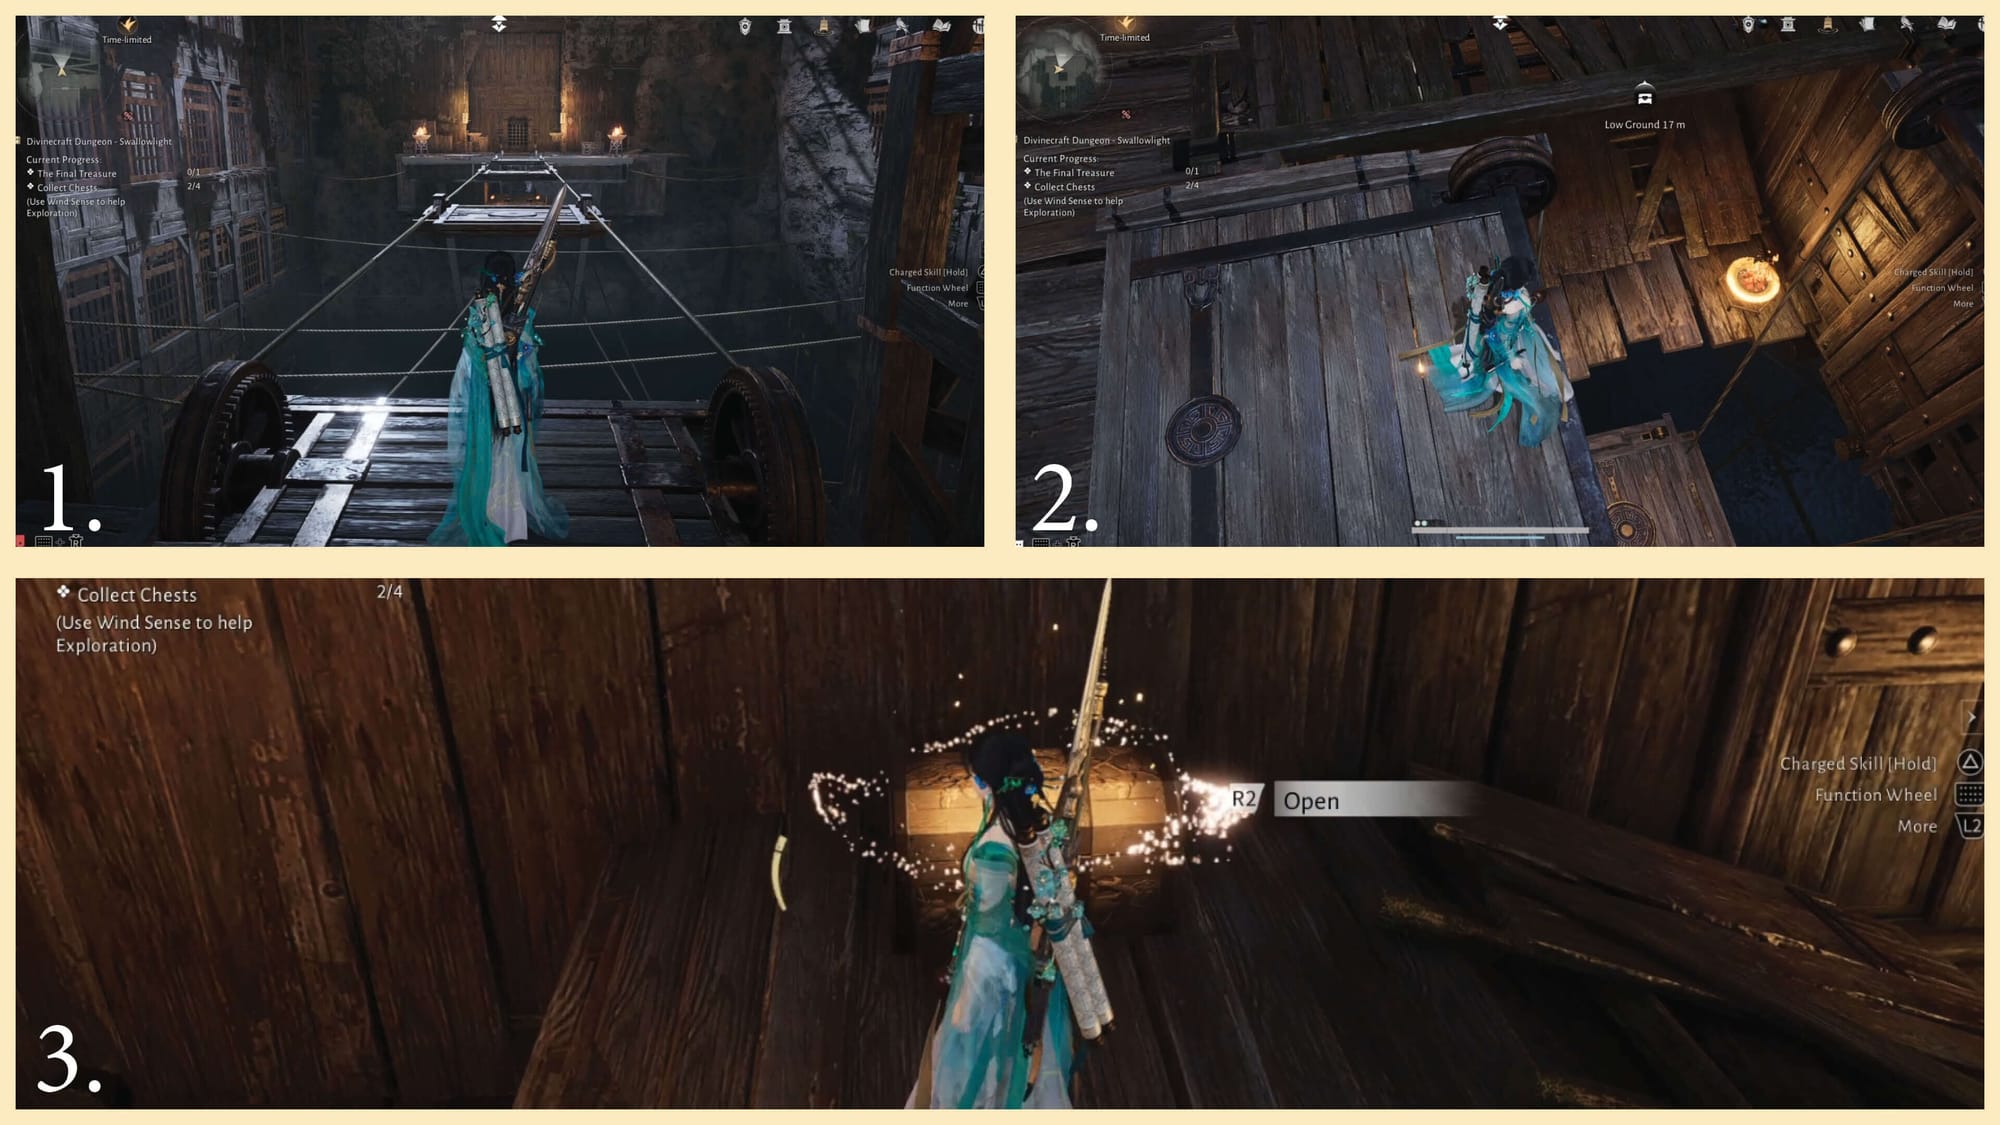
Chest Four
With Chest Three in front of you, look to your left and you’ll spot a round metal pressure plate. Step on it to open the door above. Jump up and head through the doorway.
Continue forward until you reach the second platforming section. You’ll see two hanging platforms you’ll need to jump across, so take your time and make your way carefully to the other side.
Once you arrive, there will be another hanging platform that leads upward to Chest Four. Be cautious, this platform breaks as you land on it. Quickly move forward and grab the chest.
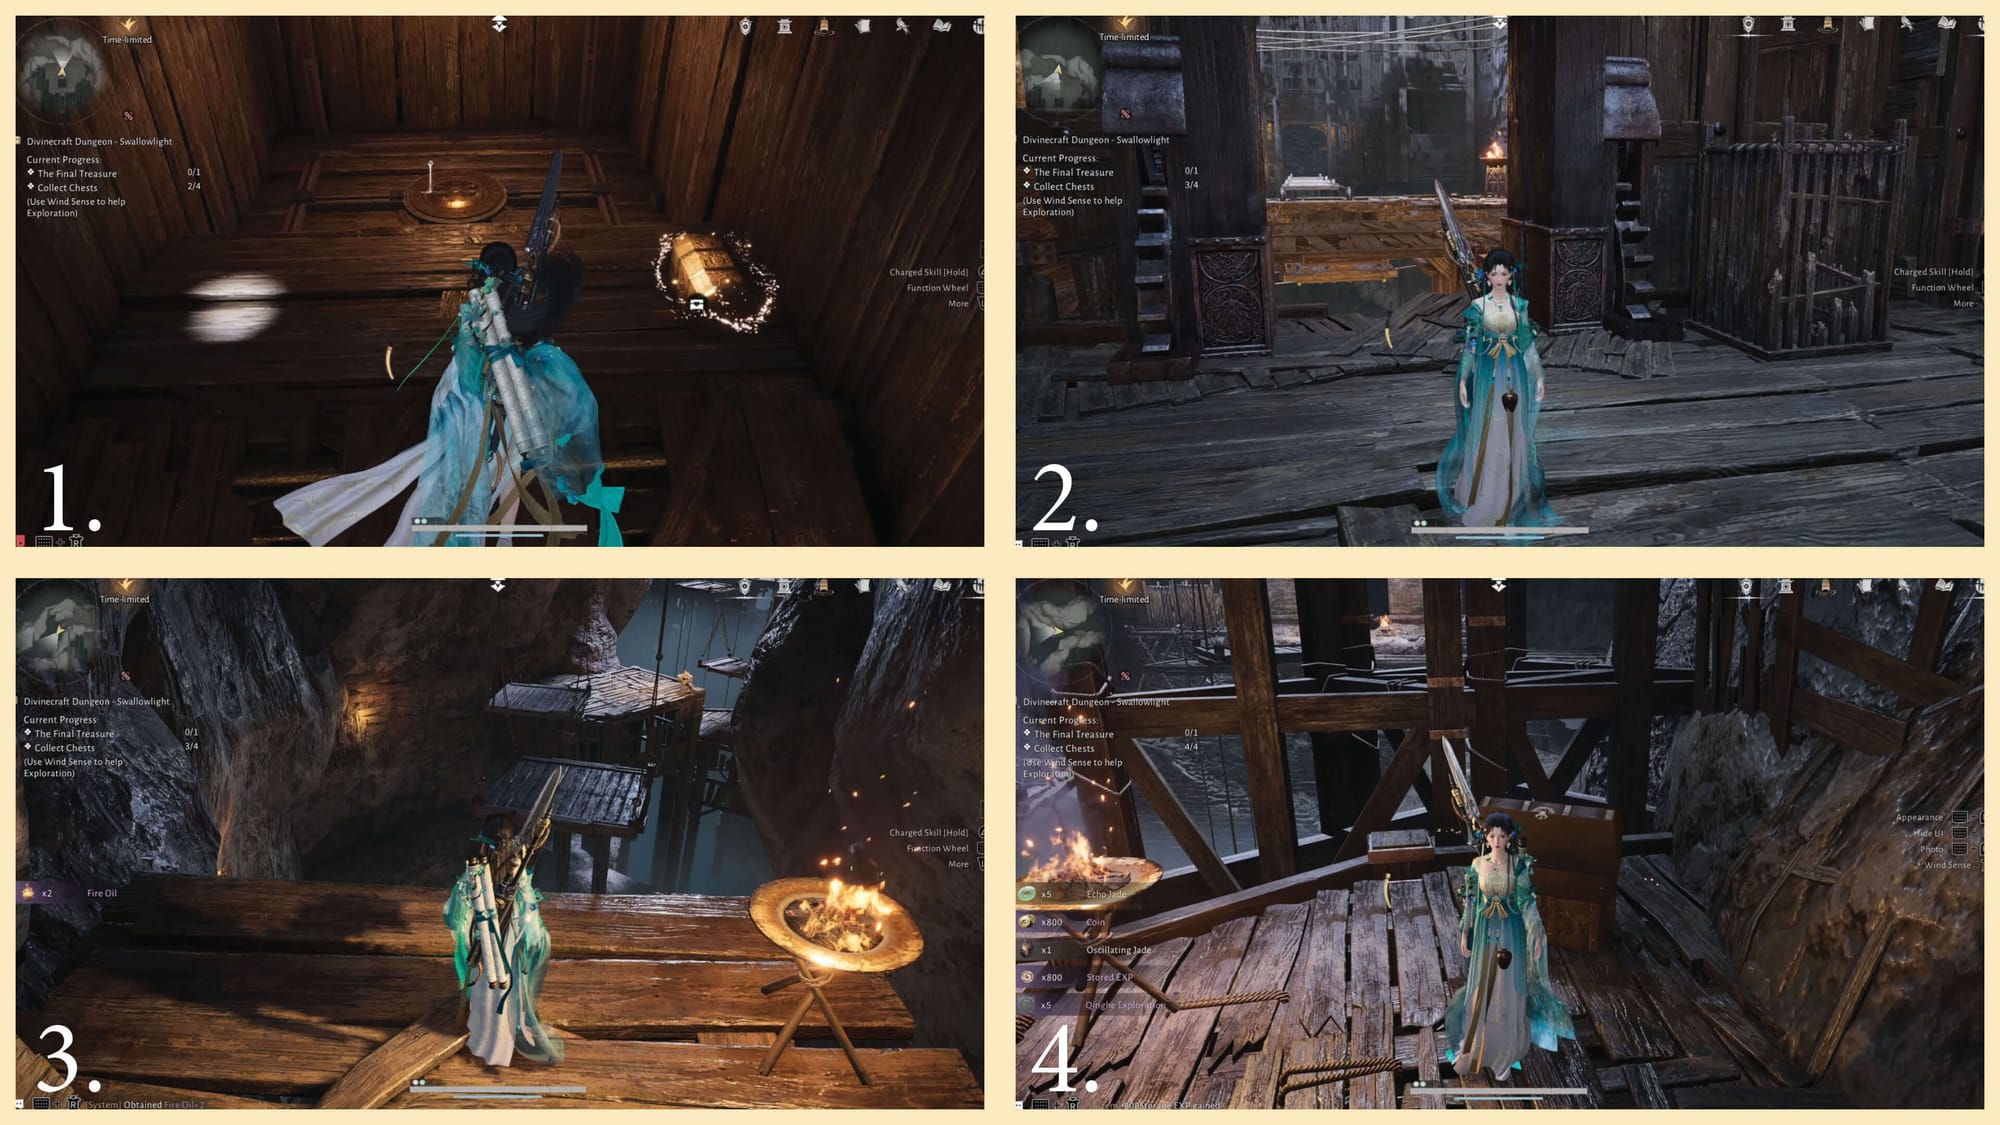
Final Treasure Chest
With the fourth chest in front of you, look to your left and you’ll see another set of hanging platforms. These platforms also break as soon as you land on them like the previous one. You need to move quickly and jump all the way to the end. Make sure your stamina is completely full before you start; I needed every bit of mine to make it across.
Once you reach the end, you’ll see the Final Treasure Chest. Go ahead and grab it to complete the dungeon.
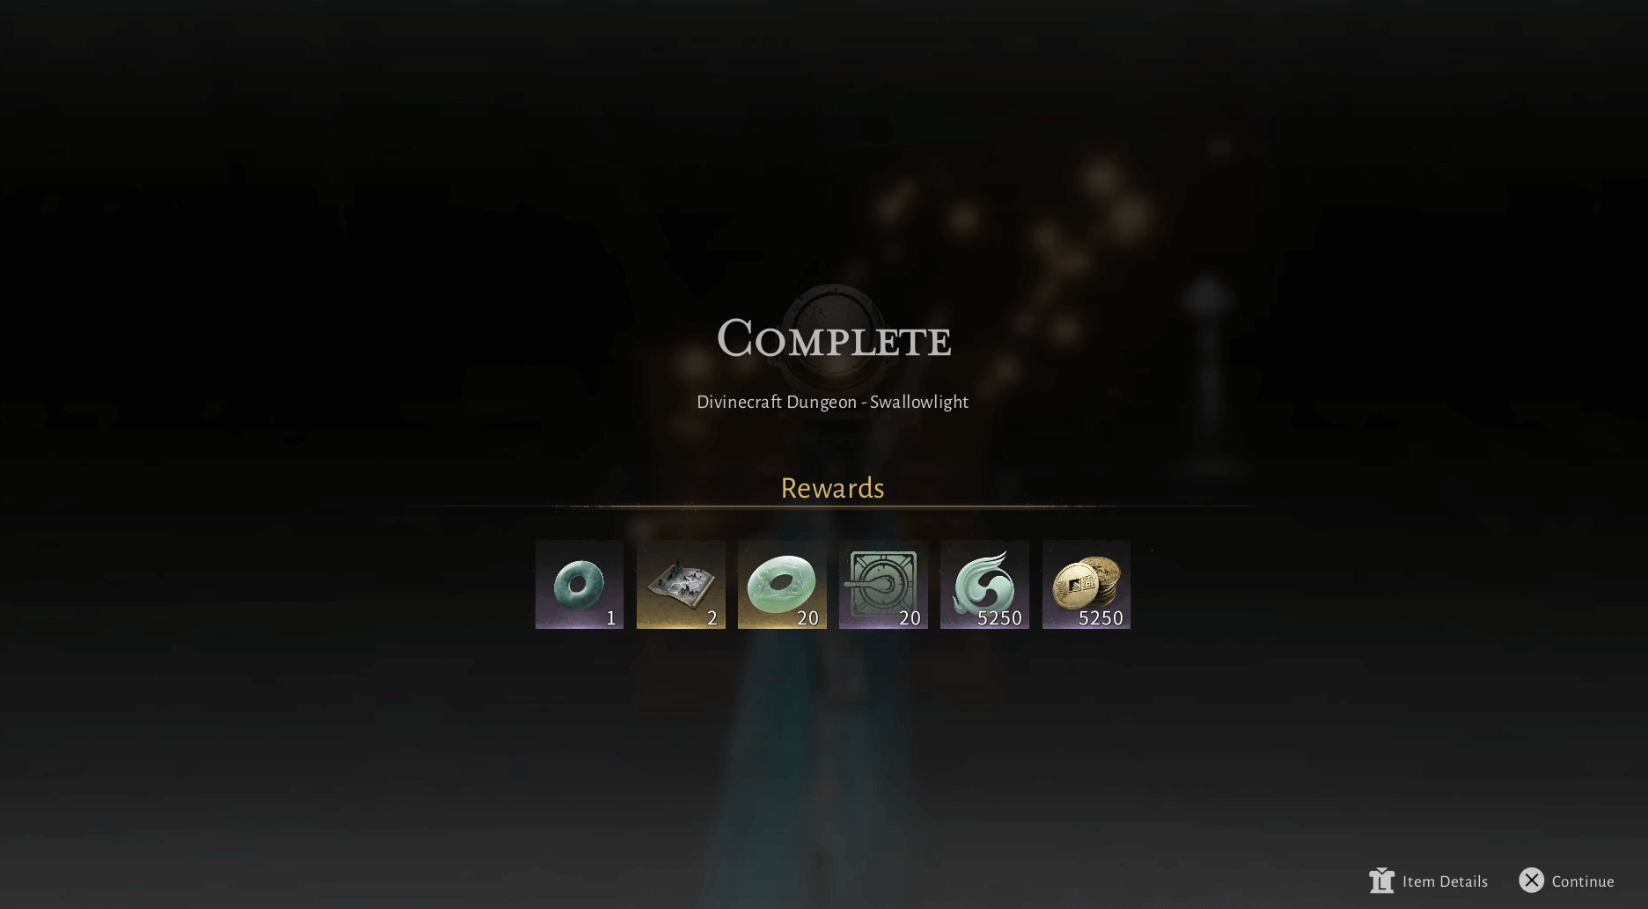
Step Three - Rewards
You get extra rewards upon completion, so make sure to find all four chests and the Final Treasure Chest. The rewards you receive upon finishing the dungeon are:
- 1 Ten Directions Disk
- 2 Medicinal Tales
- 20 Echo Jade
- 20 Qinghe Exploration
- 5,250 Character EXP
- 5,250 Coins
If you enjoyed this walkthrough, make sure to subscribe and follow along for more Where Winds Meet reviews, guides, and achievement hunts!